Everyone dreams of owning an aircraft, but in order to maintain its airworthiness, extreme care is warranted. Besides, there isn’t any choice in the matter. Compromising on aircraft preventive maintenance can be fatal for you, your passengers or cargo, and people on the ground.
To ensure safety in general aviation, the Federal Aviation Administration (FAA) – which regulates civil aviation in the US – has shared clear instructions for the upkeep of aircraft.
But with so many items to focus on, it can all get a bit confusing and overwhelming.
If you’re looking for a more organized aircraft preventive maintenance checklist, keep reading.
In this post, we’ll share a complete list of tasks – categorized according to the different components of an aircraft – which you can use as a template and share with your technicians.
Explore our free maintenance templates & checklists
The Essential Guide to CMMS
Download this helpful guide to everything a CMMS has to offer.

The Aircraft Maintenance Requirements
As mentioned earlier, the Federal Aviation Administration has a comprehensive list of tasks when it comes to aircraft preventive maintenance.
The complete details are shared in 14 CFR part 43 (appendix A to part 43).
In order to maintain the validity of your aircraft’s airworthiness certificate, you must follow the instructions of the FAA.
These instructions do not require complex assembly operations (i.e. the disassembly or removal of structural parts). Instead, it mostly entails removal of nonstructural items (such as fairings/cowlings), inspection, and lubrication.
Anything that requires taking apart a structural component doesn’t come under the definition of “maintenance” according to the FAA.
With that out of the way, aircraft checks can be classified into the following three types:
- 100-Hour Inspection – this applies to small aircraft, which are less than 12,500 pounds and are used for commercial purposes. As per the FAA’s regulations, they should be inspected every 100 hour of service.
- Progressive Inspection – this option is available for operators that own a heavily-utilized fleet of aircraft. The aircraft are required to undergo inspection in different stages over a period of 12 months, resulting in shorter inspection times.
- Annual Inspection – every aircraft, irrespective of its purpose, must undergo an annual inspection which, according to the FAA, must be carried out by licensed mechanics.
An aircraft that does not comply with FAA regulations cannot be flown, unless special authorization is acquired.
The Complete Aircraft Preventive Maintenance Checklists
Before we begin, keep in mind that the specific maintenance tasks required for your particular aircraft may vary, depending on the manufacturer’s instructions.
That being said, there are certainly good practices that include minor preservation operations (not any major repairs or replacements).
To make things easier to process, we’re going to break down the checklist according to the main components of an aircraft.
Keep in mind that the following information is for airplanes, and not hot air balloons or helicopters.
For the Wings
Let’s kick things off by talking about the wings – the most important components of the airframe.
While they may seem like two gigantic metal plates to someone who doesn’t know anything about aeronautics, they actually consist of several different intricate components.
Here’s a basic checklist that covers just about everything:
- Overall Condition – first and foremost, the wings should be checked thoroughly for cracks, dents, and bends. Visible damage should be reported immediately and sent for repairing.
- Fuel Tank – in most aircraft, the fuel is stored in the wings. Look for any leakages.
- Lenses of Positions – also known as position lights, these are located on the tips of the wings and are used to signal the moving direction of the aircraft to other pilots in the sky. Make sure that they’re working just fine.
In addition to the above, ensure that the ailerons, actuators, and flaps aren’t damaged and are properly lubricated.
For the Fuselage
Next up is the fuselage, the main body of the aircraft.
The fuselage includes critical components that are vital for smooth functioning and creating a safe environment for the passengers, cabin crew, and/or the pilots.
The preventive maintenance checklist includes:
- Seat-Belts – make sure that the safety belts are clasping properly and don’t pose any threat.
- HVAC – make sure that the air-conditioning, ventilation, and heating systems are operating just fine.
- Hydraulic Reservoirs – these should have the recommended amount of hydraulic fluids in them. Furthermore, make sure that the hydraulic connections and hose connections are properly secured and aren’t visibly damaged.
- Doors, Side-Windows, and Wind Screen – these must be properly secured and not have any visible damage.
Additionally, you should also check the upholstery for any tears and give fabric repairs (only simple fabric patches – nothing that requires disassembling a structural component).
For the Engines
Once the wings and the fuselage have been taken care of, the only vital component left is the power source – the engines.
Special care should be given to the engines, as they are the main components that keep the aircraft up in the air.
For the engines, the FAA’s recommendations for aircraft preventive maintenance, like everything else, entail taking apart only the non-structural items. Any work that warrants the disconnection of flight controls isn’t considered maintenance.
With that out of the way, here’s what you should do:
- Cowlings/Fairings – these are cover plates that should be taken off and cleaned (this doesn’t require the removal of the propeller). If you see any loose fasteners, cracks, or dents, remove or replace the cowling.
- Fuel Lines – make sure that the fuel lines and pumps are safely secured and don’t have any leakages.
- Spark Plugs – these should be removed and cleaned. When reinstalling them, make sure to re-gap them according to the recommendations of the manufacturer with a spark plug gap clearance tool.
Finally, lubricate the propeller, check that the wiring isn’t frayed, and give the engines a test-run to ensure they operate smoothly.
For the Landing Gear
Before moving on to the avionics and the empennage (the tail-part), let’s first sort out the landing gear of your aircraft.
This includes checking/replacing the:
- Landing Gear Tires – if the tires are worn out or even slightly damaged, they should be removed, repaired, and reinstalled (or replaced).
- Landing Gear Shock Struts – these are hydraulic shock absorbers that absorb most of the impact upon touchdown and minimize oscillations. These should be lubricated with oil, serviced by adding air, or both.
- Elastic Shock Absorbers – if your aircraft uses bungee cords, and they’re showing signs of damages, replace them.
- Landing Gear Wheel Bearings – these should be examined for cracks, thoroughly cleaned, and properly lubricated.
- Landing Light – replace broken bulbs and check the wiring in the landing lights.
The key is thorough greasing/lubrication and examining for wear and tear.
For the Empennage
As mentioned earlier, the empennage is the tail of the aircraft. It’s used to provide stability and helps steer the aircraft.
While the official aircraft preventive maintenance checklist by the FAA doesn’t mention anything special about the empennage (it’s covered under major alterations and repairs), you should give it a check.
This includes checking the:
- Rudder – this is the control surface that helps steer the aircraft left and right. Ensure that it’s lubricated, not damaged, and working properly.
- Elevator – this component helps move the aircraft upwards and downwards. Make sure it’s properly lubricated and isn’t visibly damaged.
- Stabilizers – these include the vertical and the horizontal stabilizers. They should be examined for any damages (such as bird-strikes).
Finally, to wrap things up, inspect the elements that are scattered throughout the aircraft.
This includes the cotter keys/safety wires, nuts and bolts, fasteners, and the avionics (communications/transponder, navigation, weather systems, etc.).
Conduct the inspection, cleaning, lubrication (wherever needed), and the replacement of small standard parts.
Furthermore, add preservatives/protective material wherever needed.
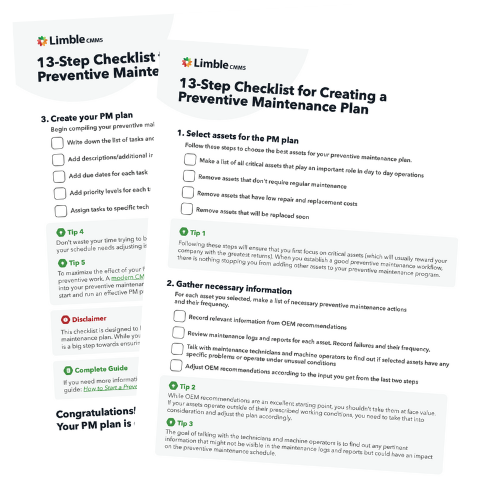
Checklist for Creating a Preventive Maintenance Plan
Following a consistent Preventive Maintenance Plan can make life easier. Use this checklist to create your own!

Creating an Effective Aircraft Preventive Maintenance Program
To stay in compliance with FAA regulations, operate safe flights, and increase the lifespans of your aircraft, you need a proper aircraft preventive maintenance program.
Here are a few steps you can take to do that:
Determine the Maintenance Requirements
Start off by assessing the fleet of your aircraft.
Based on the type of operations, service hours, and type of aircraft you’re using, determine the maintenance requirements.
How often do you need to perform PM? Does the 100-hour inspection apply to you? Do you have the manpower necessary to handle the maintenance needs?
These are just some of the questions you need to answer.
Devise a Maintenance Schedule
A PM program is incomplete without a comprehensive maintenance schedule.
This should include all the recurring aircraft preventive maintenance tasks, marked on a calendar, along with a description of the work that is to be carried out.
Furthermore, maintain a logbook/maintenance record, with proper marked date of completion for every task.
Create a Team of Capable Technicians
An aircraft owner with a primary category aircraft should at least be the holder of a pilot certificate/private pilot certificate.
Furthermore, you need to hire candidates with the appropriate repairman certificates.
Furthermore, create and implement a comprehensive training program that equips your mechanics with the latest best practices, helps them create a safe working environment at the repair station, and keep your fleet in optimal condition.
Track and Adjust
Finally, if you’re not tracking the performance of your maintenance team, you’re potentially missing out on shorter maintenance cycles and longer lifespans for your aircraft.
Look for any rooms for improvement and take the necessary steps to enhance your program.
Make Things Easier with a CMMS
Implementing a preventive maintenance program, that too, for a fleet of aircraft, can be tough – especially if you’re still relying on outdated computer programs, or worse, no software at all.
To streamline everything, consider investing in a reliable preventive maintenance software to handle your aircraft PM needs.