Equipment Calibration
Everything you ever needed to know about equipment calibration.
What is equipment calibration?
Calibration is the process of evaluating and adjusting measurement devices to achieve true accuracy. When equipment is calibrated, you can be sure that the readings are accurate and precise.
Equipment calibration programs are an essential part of precision maintenance and will need to be carefully planned and executed to be successful.
There are two main categories for calibrating equipment:
- Absolute calibration is where you compare the reading of your instrument to a known reference value. For example, you place a 1 kg mass on a scale and adjust the reading to 1 kg.
- Relative calibration is a process where you compare instrument values to another instrument that is already calibrated. One example is calibrating a pressure sensor with another pressure gauge that you can trust.
Checklist for Creating a Preventive Maintenance Plan
Following a consistent Preventive Maintenance Plan can make life easier. Use this checklist to create your own!

Why calibrate your equipment?
Using uncalibrated devices is not only a costly waste of time, but it can also be dangerous. Here are a few of the reasons why you should prioritize proper equipment calibration.
Product quality and safety
For one, product quality can be affected (i.e. improper recipe quantities, improper weights, etc.). Many products depend on precise additions of different materials.
Many of us have slipped up while baking chocolate chip cookies — too much butter caused the cookie texture to be too soft. If we don’t know precisely how much butter we added, how can we adjust?
This can be massively important in food and drug manufacturing, where imprecision can cause health risks to consumers. Similarly, calibration should be a regular part of your CNC machine maintenance to ensure they stay as precise as they need to be.
Process control
Another way that calibration can affect your operation is through process control.
Say you need to use an oven in your process. A drifting temperature sensor could spell a disaster, leading to overheating or not fully drying a product.
Cost savings
An alternative way to think about equipment calibration is in dollars.
There is a cost associated with almost everything you are measuring at your plant. Temperature costs money to maintain. The flow of raw materials or products is money entering or exiting a process. Inaccurate electrical data could be a hidden cost in your energy bill. It goes on and on.
You want your operation to produce high-quality, reliable data. This is why you will need to calibrate your instruments regularly.
Different types of equipment calibration
There are many types of equipment calibrations. Each serves a specific need across a wide variety of industries.
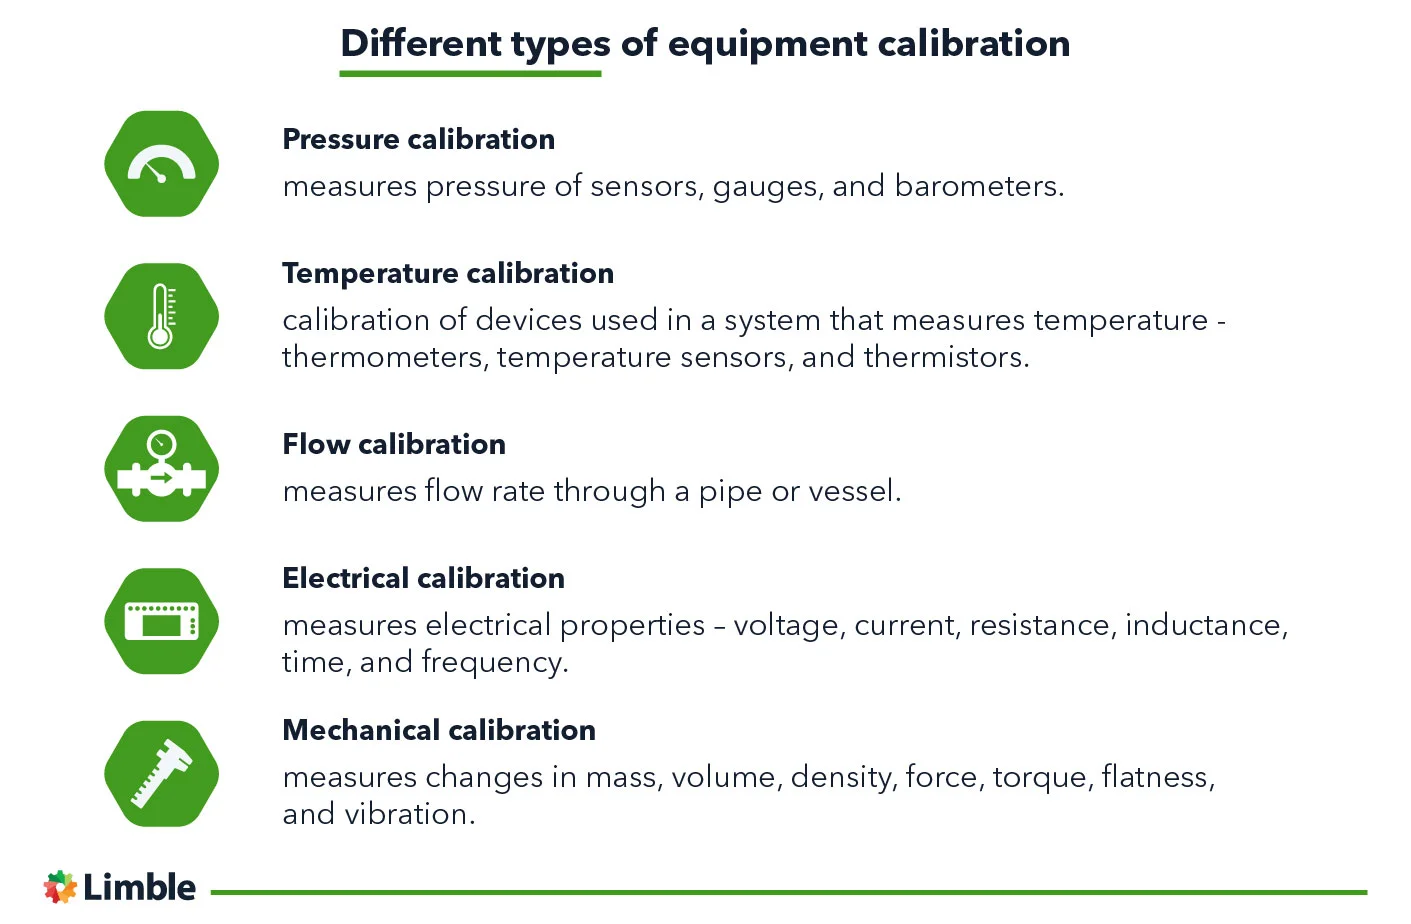
Pressure calibration
Pressure calibration is required in many industries working with gasses, steam, or hydraulics. The need may arise from industry requirements, or a desire to control the process.
For these applications, pressure sensors, pressure gauges, and barometers are typically the devices needing calibration. The calibration can be done using either the absolute or the relative method.
Temperature calibration
In many industries, the temperature needs to be measured precisely. It is vital that thermometers and temperature sensors accurately reflect the process values.
Devices most often calibrated for temperature are thermometers, temperature sensors, and thermistors.
Temperature is typically calibrated by placing the thermometer in a stable reference environment, and then comparing the reading to a standard or reference thermometer.
Electronic temperature sensors need to have both the electronics and the sensor calibrated.
Flow calibration
The process flow rate through a pipe or vessel is measured using a flow meter. These flow meters often require precision for the desired flow rates, so that processes can be controlled effectively and safely.
Many chemical processes need a precise flow of material at a specified rate during a certain process. If the material is not delivered in a precise and steady flow, the consequences can be disastrous.
For these reasons (and many more), flow meter calibration should never be overlooked.
Electrical calibration
By “electrical calibration” we mean ensuring that any instrument used to measure electrical properties is showing accurate measurements. This includes reading voltage, current, resistance, inductance, capacitance, time, and frequency.
To calibrate electrical devices, you will need to use specialized precision instruments to verify the Units Under Test (UUT) are reading properly. A precision digital multimeter can accomplish many of the calibrations required.
Mechanical calibration
Mechanical calibration is used to correct any instrument measuring mechanical properties like mass, volume, density, force, torque, flatness, and vibration.
Repeat use, mechanical stress, and temperature cycles can all cause mechanical instruments to drift. Under a temperature-controlled atmosphere, either absolute or relative calibration can be used, depending on the device and the needs of the tester.
Asset calibration standards
Many well-accepted industry standards will require the factory to regularly calibrate their devices, as well as maintain calibration records.
One such standard is ISO 9001 which sets certain principles for managing the quality of products and services.
Aside from ISO 9001, there are other standards that you will need to follow, based on the industry you operate in:
- US CFR 21 — Food & Drug Administration regulations that outline calibration requirements similar to ISO 9001.
- ISO 17025 — used in laboratories to show they generate valid results.
- US CFR 40 (EPA rules) — focus on the protection of the environment.
- NFPA — promotes safety standards, and advocacy on fire and electrical hazards.
Beyond that, each instrument needs traceability — meaning a chain of calibrations all the way to an SI standard (which is just another word for a metric system).
Standard equipment calibration process
The process of equipment calibration depends on the type of instrument being calibrated and could have many case-specific steps.
However, that doesn’t prevent us to present a general process, which is shown in the graph below:
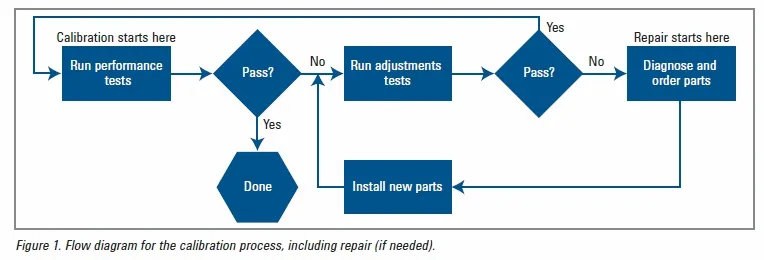
Flow diagram for the calibration process. Source: Callabmag
Recall that there are two main methods of calibration — absolute and relative.
The absolute method uses a known reference (such as the boiling point of water), while the relative method relies on another instrument that is already calibrated.
The basic process for calibration is to compare the instrument with a known value. A relative calibration method might look like this:
- Expose a pressure gauge and a trusted calibrated pressure sensor to a common pressure source.
- Check the reading once the device measures a known value.
- Adjust the device being calibrated if it’s measuring above or below the known value.
- Change the reading so that it matches the known number.
The method for changing the readings on devices can differ, but in general, there are two ways:
- The mechanical method — twisting a knob or tightening a screw.
- The electrical method — done through a calibration instrument or the device’s user interface.
That being said, let’s also mention how, these days, you can buy devices that can be automatically calibrated.
During the calibration process, always check the tolerance of the device being calibrated, and compare it to the device calibrating it. The calibrating device must have a larger tolerance.
For example, if you want to calibrate a gauge to 0.1 mm tolerance, the calibrating device should have 0.01 or more tolerance (a rule of thumb is 10 times more). The tolerance level required will vary according to industry and country.
The Essential Guide to CMMS
Download this helpful guide to everything a CMMS has to offer.
How to improve your equipment calibration program
Prioritize calibration, and give it importance in your maintenance shop culture. If you don’t act like it is important, your staff won’t either.
If you have not already, conduct a review of your existing calibration program, and consider these questions:
- Are the current calibrations showing value?
- Is there anything that could be automated or reduced?
- Do you need to add more calibrations to your schedule?
Take a look at your maintenance schedule and plan out your calibrations if you haven’t already done so. Also, make sure you are giving the technicians enough time to complete calibration activities properly.
A CMMS can be a big help in developing and executing a calibration program. It can automatically schedule all those pesky calibration tasks and track their completion. By looking at maintenance logs, you’ll be able to spot problematic instruments that are drifting more than others.
Want to see Limble in action? Get started for free today!
Commit to regular calibration
You need to be able to trust your process data. Calibrated instruments will deliver high-quality data you can count on. Committing to regular calibration schedules will help you with:
- Production of high-quality products
- Cutting costs and saving money
- Increasing revenue and profitability
- Reducing stress
If you want to find out more info about asset management, equipment reliability, or equipment performance, keep browsing the Limble blog.
