Have you ever lobbied for a major shift in the way you manage your work? If not, it can feel daunting. If so, you know how daunting it actually is.
We are here to help. Below, we break it down into manageable chunks — five straightforward steps — that will take you from start to (almost) finish.
Step 1: Get buy-in from relevant parties
This is the most crucial part. If you do not find a way to get people to want the change, they will never do it. The rest of your efforts will be a waste.
The stakeholders (people who care about and are impacted by your work) will vary from organization to organization. Still, they will likely fall into three categories. Here we break down why and how to bring each one on board.
Management and finance leaders
Here is the reality: Over 60% of decision-makers think maintenance is simply a cost of doing business and a necessary evil. Plot twist: Use that to your benefit!
If you can show them a way to increase efficiency, reduce costly downtime, and lower overall operating costs, they will be all-in. But the decision-makers in management and the friendly folks in Finance will need to be shown the benefits of preventive maintenance with actual data.
Request funding for a CMMS software like Limble to:
- Streamline existing reactive maintenance.
- Get stats on your department’s current output.
- Multiply the benefits of moving to preventive maintenance (since the CMMS does so much of the work for you).
- Provide a cost-benefit analysis. Use real examples of direct and indirect costs of the current strategy. Use real examples of how PM can minimize those costs.
- Use Limble’s CMMS ROI calculator if you need help.
Real-life example from purchasing
COST:
- It takes 20 hours a month for a team member to process all the paperwork for purchasing. At $20 per hour, it adds up to $4,800 per year.
- Limble would completely automate all that paperwork and would cost this organization $1,440.
BENEFIT:
- By using Limble for the purchasing function, the cost savings for this organization was $3,600 each year.
- In addition, it frees up that staff person who can now use their time filing for refunds on damaged or unused materials.
- TOTAL BENEFIT after purchasing Limble: $3,600 per year plus any parts refunds.
That sounds like a no-brainer. Approved!
Production and operations leaders
The managers and supervisors on the floor can be important allies in making your case. They are just as invested in avoiding costly and disruptive breakdowns as you are. The more voices you have supporting this transition, the better.
In addition, Production will need to be on board with your new maintenance schedule as well. The operators will need to make equipment available for servicing. In some cases, you may even train the operators to do the simpler maintenance tasks themselves.

There are a lot of ways to earn this group’s support. If presenting in a big meeting is not your cup of tea, or if you feel you just will not get anywhere that route, here are some other suggestions:
- Consider targeting them one at a time. One-on-one conversations can be very effective. You can root out what matters most to them and show how PM helps them get it. Personalize the message for each person this way.
- Identify a recognizable term that you can repeat to remind others of the importance of what you are proposing. For example, the phrase “ahead of the curve” fits PM well. Use it in meetings where everyone can see management supports the concept. Then, if someone resistant to PM tries to give you extra tasks, you can say, “You’re right. Doing that is a priority. But I will not be able to do it until we get ahead of the curve.”
Maintenance technicians and tradesmen
Diligently following new schedules and using new software can be a big change, as can moving from a reactive to a preventive mindset.
The good news is, there is an easy way to get your team excited about the change: Include them in the process of developing your PM plan. They have hands-on experience with every piece of equipment. Ask them how they would like to see it cared for. Chances are that they have been telling you for years (in the form of complaints). Show them they have been heard. Before long, they will see it making their lives a whole lot easier.
Here is how your CMMS helps:
- Checklists: With Limble, you can make it impossible to skip steps. We dive a little more into checklists later, but they are a great tool to reinforce best practices. For instance, to proceed with repairs, require a tech to upload a photo of lockout tagout equipment in place. You get both safety and good record keeping.
- Dashboards: Each technician gets their own dashboard in Limble. They get to see a summary of all the tasks they have completed, both reactive and preventive. Your high performers finally start getting credit for all their amazing work. Underperformers have nowhere to hide. Teams have even been known to engage in a little friendly competition to outdo each other.
Step 2: Select your maintenance software
Every CMMS will have the standard modules/functions below. Make sure they are easy to use!
- Workflow automation
- Downtime tracking
- Inventory management
- Purchase orders
- Real-time data and analytics
Unlike many CMMS, Limble offers different subscription options. This is a great way to get the mix of functions and modules that will work best for you. It also helps you avoid paying more for a system that offers bells and whistles you will not need or use.
Step 3: Pilot!
Once you have your CMMS software in place, think about how you will carry out your pilot. If you are using Limble, you have a couple of options here.
Option 1: Stand-alone project
Identify an upcoming project or specific asset that is a decent example of your overall workload. Use the software to guide you as you design its PM program. Invite only the relevant techs. Encourage them to talk up their good experience to the rest of the team.
Option 2: Build-as-you-go
Another way to approach a pilot is to hand Limble over to a couple of willing technicians. They begin by simply loading the next task that knocks on their door, regardless of the asset.
Get a call that the air-conditioning is not working? Open Limble and start your very first work order. This is one of the advantages of Limble in particular. It is ready to use right away. You do not have to load an entire plan for it to work. You quite literally just start using it.
If it is a more experienced technician, give them the time to enter all the steps they took to service the equipment/fix the break. Then, make that a standard operating procedure checklist to attach to tasks when it needs to be done again in the future.
Once you have decided on who and what will be involved, determine a timeframe for the pilot. Limble is so easy to use that you do not need to set aside much (or any) time for training. If anything, training might help staff feel supported in the change and ensure that everyone knows the expectations (more on expectations in our tips section below).
Step 4: Expand the program to other assets and team members
Gather feedback from the staff in your pilot on what worked and what did not. If you are using Limble, you can also call or message your rep, who would also love to hear this input to help you leverage the tool to its fullest.
If you took the standalone project approach and that worked well for you — and if you have the bandwidth — the next step will be a criticality assessment of all your assets.
As part of this process, make a note of:
- which assets should be included in the Preventive Maintenance schedule
- manufacturer-recommended maintenance
- regulatory-required maintenance
You will use this information to build out the remainder of your PM schedule, incorporating the schedule and learnings from the pilot.
On the other hand, if you took the build-as-you-go approach, you can simply expand the use of Limble to the remainder of your maintenance team. They can continue to build in each work order and project as they go.
Pat yourself on the back. You have a PM strategy in place!
Step 5: Done! Just kidding: Track and adjust
Here is a secret: Implementation is never actually over. Now that you have a solid PM program and a CMMS that facilitates and tracks how you are doing, you need to use all that valuable data. This is where it pays off.
The best preventive maintenance programs regularly review maintenance KPIs and find ways to get even better. Here are some of the most valuable metrics:
- Work orders issued/completed (increases as preventive work assigned; common goal is 80% preventive, 20% reactive)
- Productivity (decrease in emergency labor hours)
- Decrease in total equipment downtime
- Equipment costs (initial increase when wasteful equipment is identified and replaced; decrease over time as PM takes effect)
- Increased adherence to deadlines (and less deferred maintenance work)
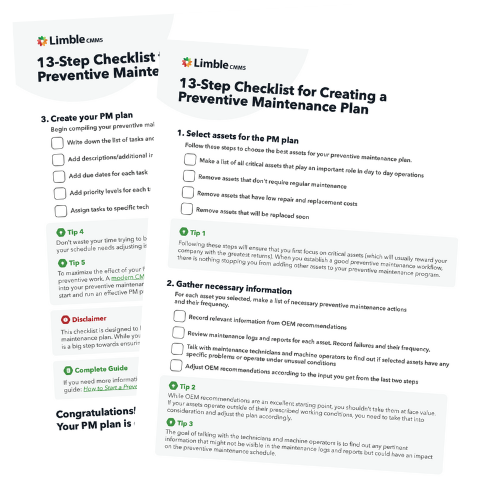
Checklist for Creating a Preventive Maintenance Plan
Following a consistent Preventive Maintenance Plan can make life easier. Use this checklist to create your own!
7 tips to help you carry on carrying on

1: More than a project — a team dynamic
Be clear about roles and responsibilities
- Who creates PM checklists and schedules?
- Who gets which types of assignments (for auto-assigning)?
- Who tracks the stats?
Think outside the box about roles
Do not limit yourself to your technicians and tradesmen. Limble checklists make some preventive maintenance tasks so simple, other staff can easily take them over.
For instance, give Limble accounts to printing press operators so Limble can prompt them to clean the printheads every three hours. This leads to fewer calls to technicians to resolve gummed-up parts.
Reinforce consistency
When everyone does things their own way, it is tough to track tasks and know where to improve. It is tough to identify which part of a process is failing if it is not being carried out the same way every time.
Limble customers often tell their teams, “If it isn’t in Limble, it didn’t happen.” If a task is documented in Limble, that means your team followed the checklist — the same way, every time.
Monitor for follow-through
Use the metrics in your CMMS to:
- Stay connected to your team.
- Keep a close eye on the execution of your plan
- Ensure techs are hitting deadlines
While all this happens, watch Limble build up a searchable work history on every asset. It’s a beautiful thing.
Use trusted leaders as champions
Sometimes, a trusted peer can be a lot more convincing than a boss. Identify the influential members of your team and let them bring the crew on board. If these individuals have both influence and skill, they may be your future maintenance managers.
Don’t dictate — motivate
While you want your team to be excited about this change, you also want to be realistic. If a team member has a hard time accepting checklists or other tools, help them understand the why. Emphasize that this will help everyone see how valuable their work is. Follow through on that promise by publicly acknowledging their contributions regularly.
Pay special attention to those who might be struggling
Garbage in, garbage out, so keep the garbage out! If you have added new CMMS software, make sure everyone is using it correctly. If work is not documented well, your metrics and reports will not be accurate. It is so important to spot and fix bad habits as early as possible.
The good news is that not only does Limble make it difficult to do things wrong, but it also makes mistakes easier to find. Your Limble rep will also keep tabs on your account and reach out if there appear to be anomalies.
2: Define and track relevant metrics
You can’t improve what you don’t measure. You are implementing preventive maintenance for a reason. Do you want to reduce maintenance operational costs? Lower your inventory costs? Reduce the number of unexpected breakdowns? Improve productivity?
Define your maintenance KPIs and then see which maintenance metrics you can use to track your progress towards those goals. If your records are a mess, you might need to run your CMMS for a couple of months to first see what your starting point is. After that, you can work on defining your maintenance goals.
Tracking important metrics is vastly simplified if you are using a CMMS. The software can automatically calculate a wide array of metrics like MTBF, MTTR, maintenance costs, planned vs unplanned work, are PMs getting completed on time, etc. With a deeper insight into these metrics, it is much easier to identify what is preventing you from reaching your goals, as well as where you have the most room for improvement.
3: Lean into checklists
In Limble, you can create PM templates with as many (or as few) steps as you like. The more detail you provide, the faster the work gets done. Checklists speed up processes and keep a consistent quality of work. They are simple and easy to use and take any guesswork out of the day-to-day maintenance operations. Limble automatically attaches those PM checklists and diagrams to work orders, making consistency and communication the norm.
For those who want to learn more, here is an excellent guide on creating preventive maintenance checklists.
4: Be realistic
We mentioned this in the first tip, but it bears repeating. Start by developing realistic PM schedules that you know your team can achieve with the resources it has. If your initial PM schedule is unrealistic, you are set up for failure before you even begin.
With Limble, I can track all of our supplies that come in, how they are getting used, look at the usage rates, and then also be able to forecast budgets for next year. It has dropped my budget tremendously; I was actually able to hire another guy because of what we were able to save.
– Benjamin Scott, Facilities Supervisor, Intercontinental Hotels Group
5: Minimize excessive maintenance
The scariest risk of PM is as easy to avoid as one-two-three:
First: Adjust your PM schedule based on usage and working conditions
It may seem obvious that less maintenance is needed on an asset that is used less. Still, it is often not possible for manufacturer recommendations to take usage into account. Use those generic recommendations as a starting point. From there, also consider how much the equipment gets used and under what conditions. Adjust your schedule to account.
Second: Review assets you spend a lot of time on
Do you have a piece of equipment that you consider to be a problem child? A squeaky wheel (literally)? You know the one. If something takes up a lot of maintenance time, it is time to reinvent that (squeaky) wheel.
If you have multiple of that make/model, try a new PM routine on just one. If that resolves the issue, then voila. You have your solution. If not, keep testing out different approaches until you find one that works.
Third: Double-check your diagnosis
Most organizations will have a few stressful assets that never work right, no matter how much preventive attention they get. Excluding poor design and defective products, there are two common reasons why this may happen:
- Fixes address the wrong problem (for example, doing too much lubrication instead of cleaning the gears).
- The asset is misused (for instance, the equipment is not used correctly, or parts have been installed wrong).
6: Follow inventory management best practices
There is a lot of research out there on best practices for spare parts management. Still, most recommendations include some combination of the following:
- Start by managing your maintenance. You cannot manage inventory well if you are not managing maintenance work well in the first place.
- Standardize maintenance procedures. If you do the same work the same way every time, you will need the same parts at the same intervals.
- Track and categorize spare parts.
- Automate purchasing.
Luckily, Limble was built to steer you right into these best practices without ever having to think about it. It’s like cruise control for best practices.
7: Automate it all with your CMMS
When fulfilling a work order, you are way more effective if you have the right tool for the job. The same is true for your PM strategy.
When implementing preventive maintenance, the CMMS you choose (or just using one at all) is the one choice that can make or break the transition. The right CMMS will address many potential drawbacks while incorporating all these tips and best practices.
Guide to Moving from Reactive to Preventive Maintenance
Want to transition away from costly reactive maintenance but don't know where to start? This guide has everything you need to know.